Installing MySQL on your mobile with Termux (For A/L Dummies)
This tutorial is mainly aimed for those who want to mess around MySQL query language and learn how to work with it, like solely for academic purposes.
If you’re looking for a tutorial about actually hosting a database with your android (i heard its possible) you’ve come to the wrong place.
Note for AL ICT students 😏
All this may seem little complicated for you, ik cause I’ve been there but I really recommend all of you to break the ice and actually give it a go. This whole tutorial would take you about 10 minutes and trust me its reallyyy simple. I would say termux is a nice place for you to take a peek in the amazing ‘open’ world of linux and command line tools in general. If you encounter any errors while executing the steps I’ve mentioned below, try to read the output (even though it looks f scary and complicated) there’s a huge chance that you’ll understand whats going on. I always use google to look for solutions and in most of the times I do manage to find a working fix and learn a bunch at the same time.
Setting Up Termux
The playstore version of termux is pretty old so its not recommended to download it from google playstore. Alternatively you can download and install termux apk from github.
Downloading And Installing Termux
Head over to termux-github-repo and download the arm64 version cause its gonna work on most mobile phones, but if it doesn’t install go with the **armeabi-v7a **version apk.
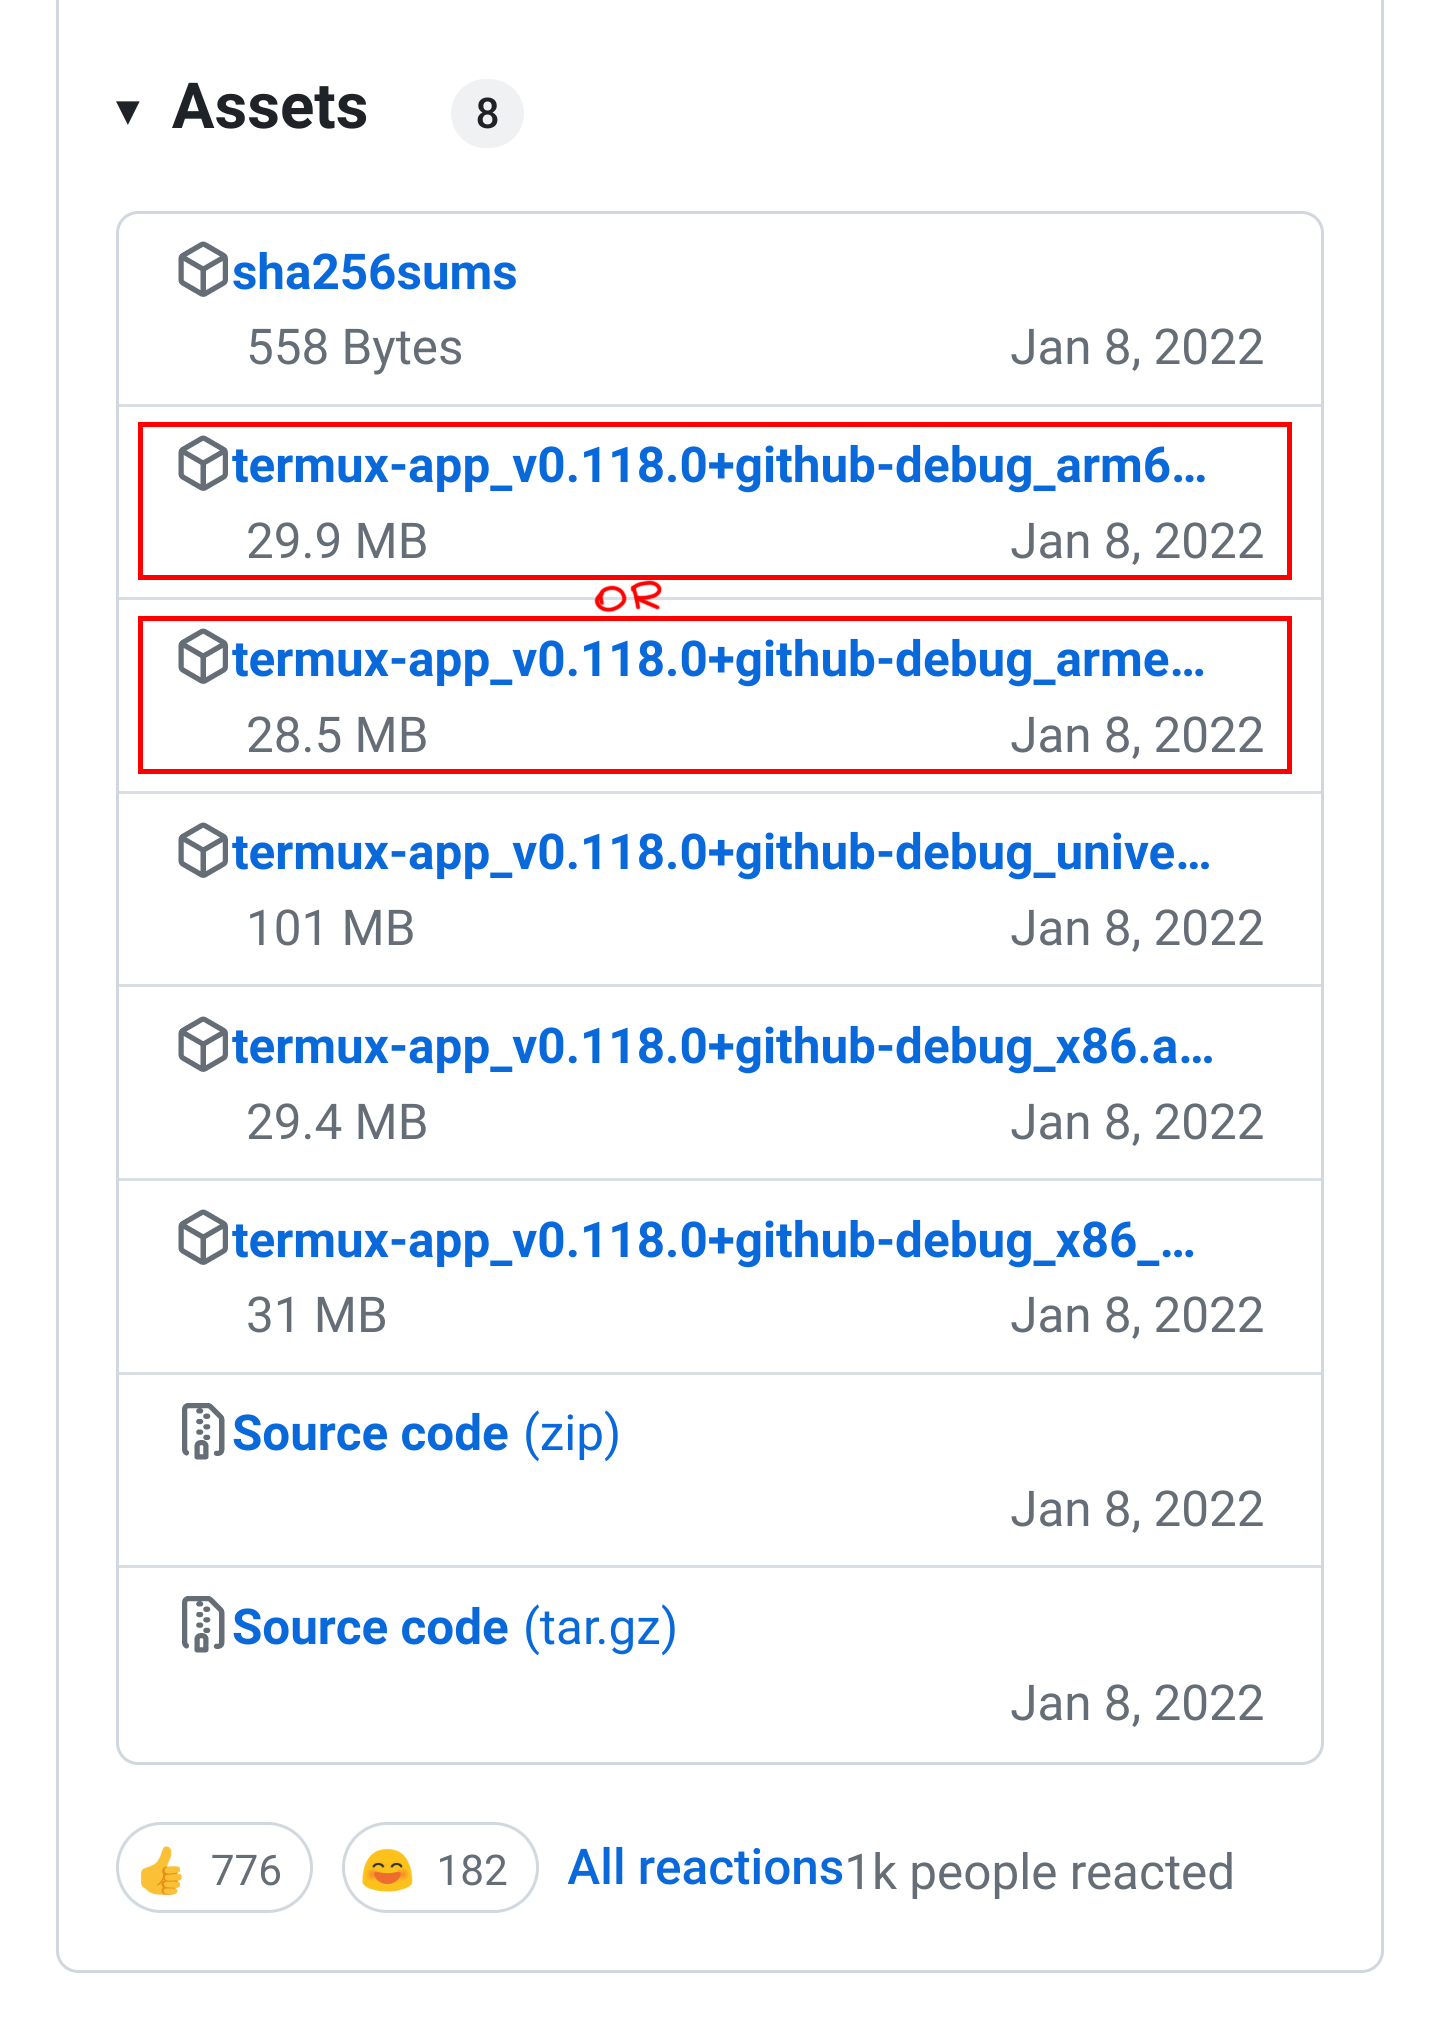
After downloading install the apk as you would normally do, through the file manager.

Installing MySQL
Before installing MySQL we have to do some configurations inside termux in order for things to work properly.
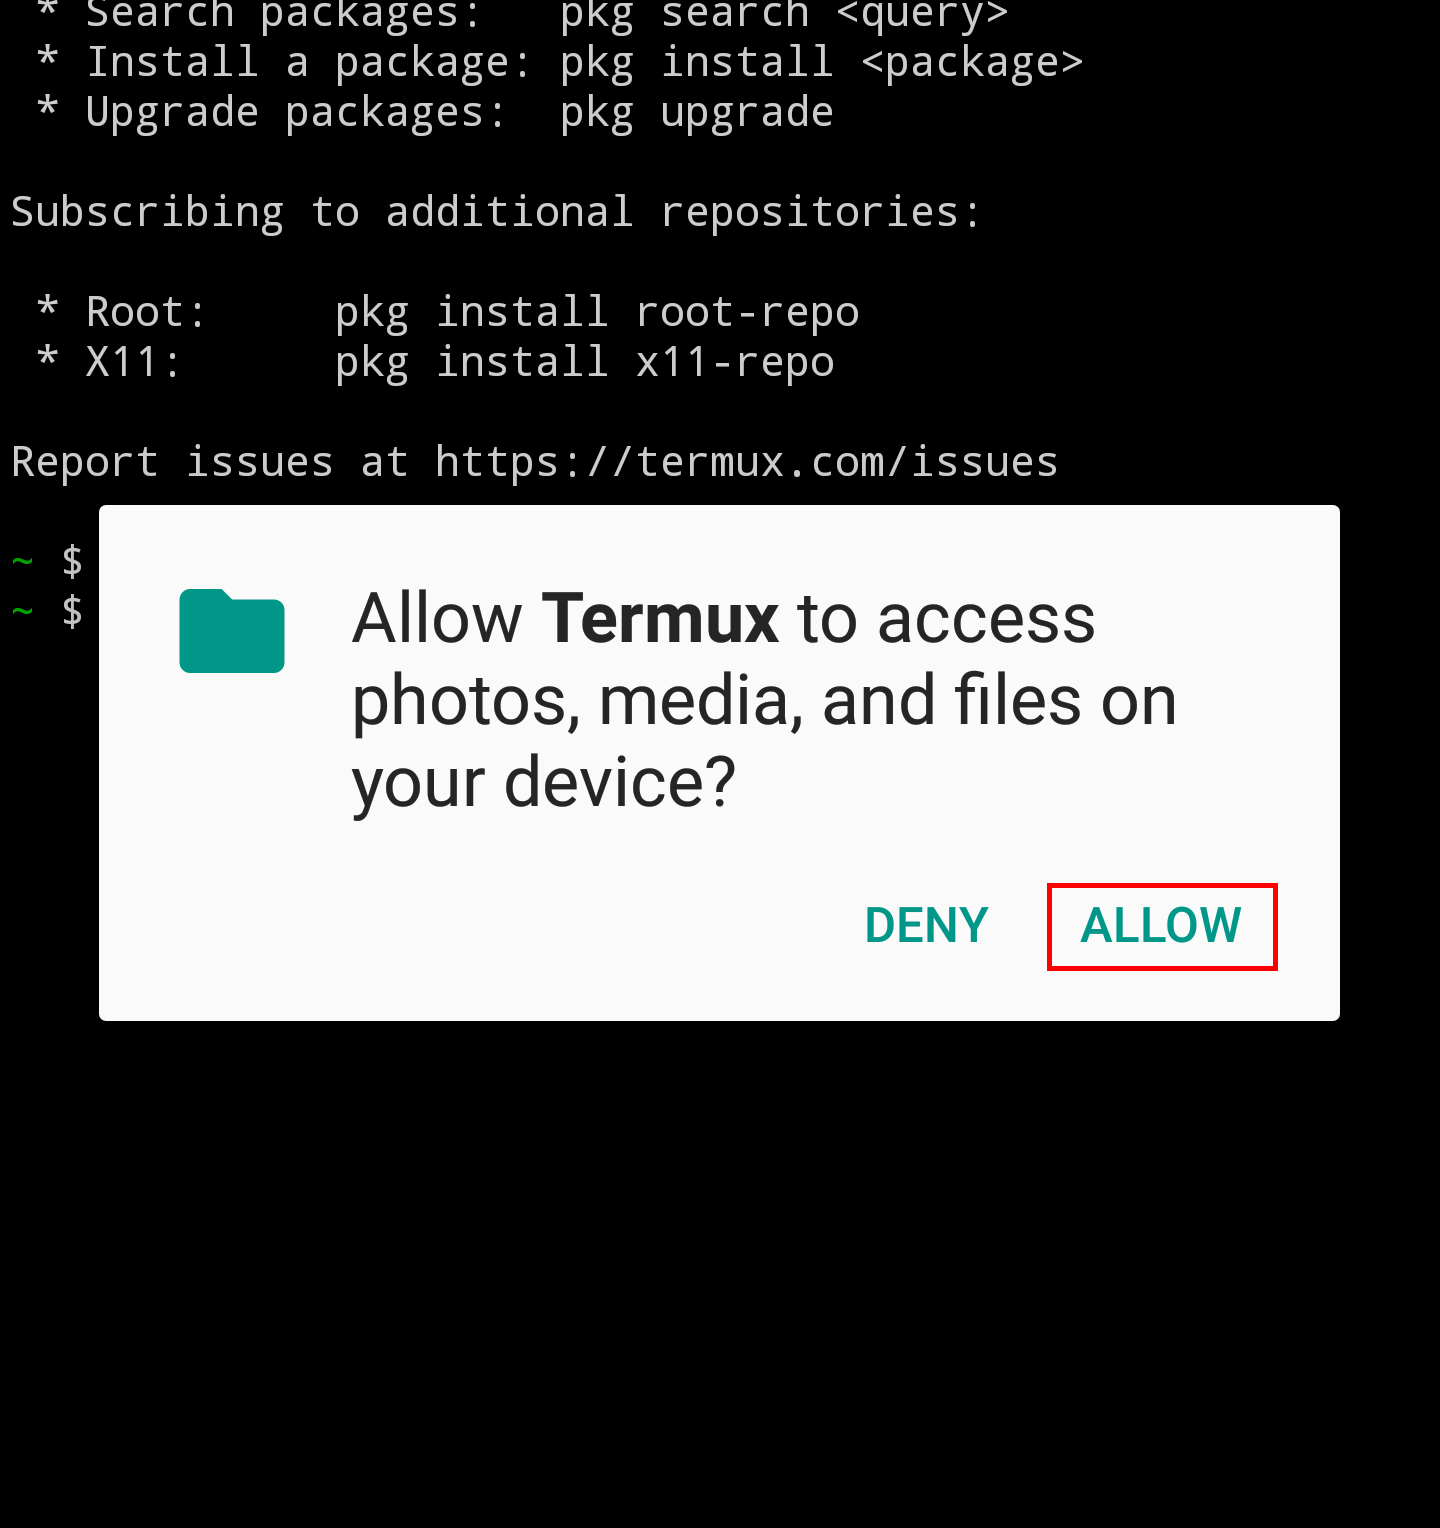
Setting Up Storage
In termux type
termux-setup-storage
and hit enter. A window saying requesting storage permission should appear, press “Allow”. This allows termux to store files on your mobile, and for you to access files on your phone through termux.
Updating packages to install MySQL
In your Termux application execute
apt update
And then:
apt upgrade
In both cases, if the app asks, choose yes, that is, put the letter “y” and tap enter. This step is very important because it will update the libraries that are necessary to install mysql on your mobile device.

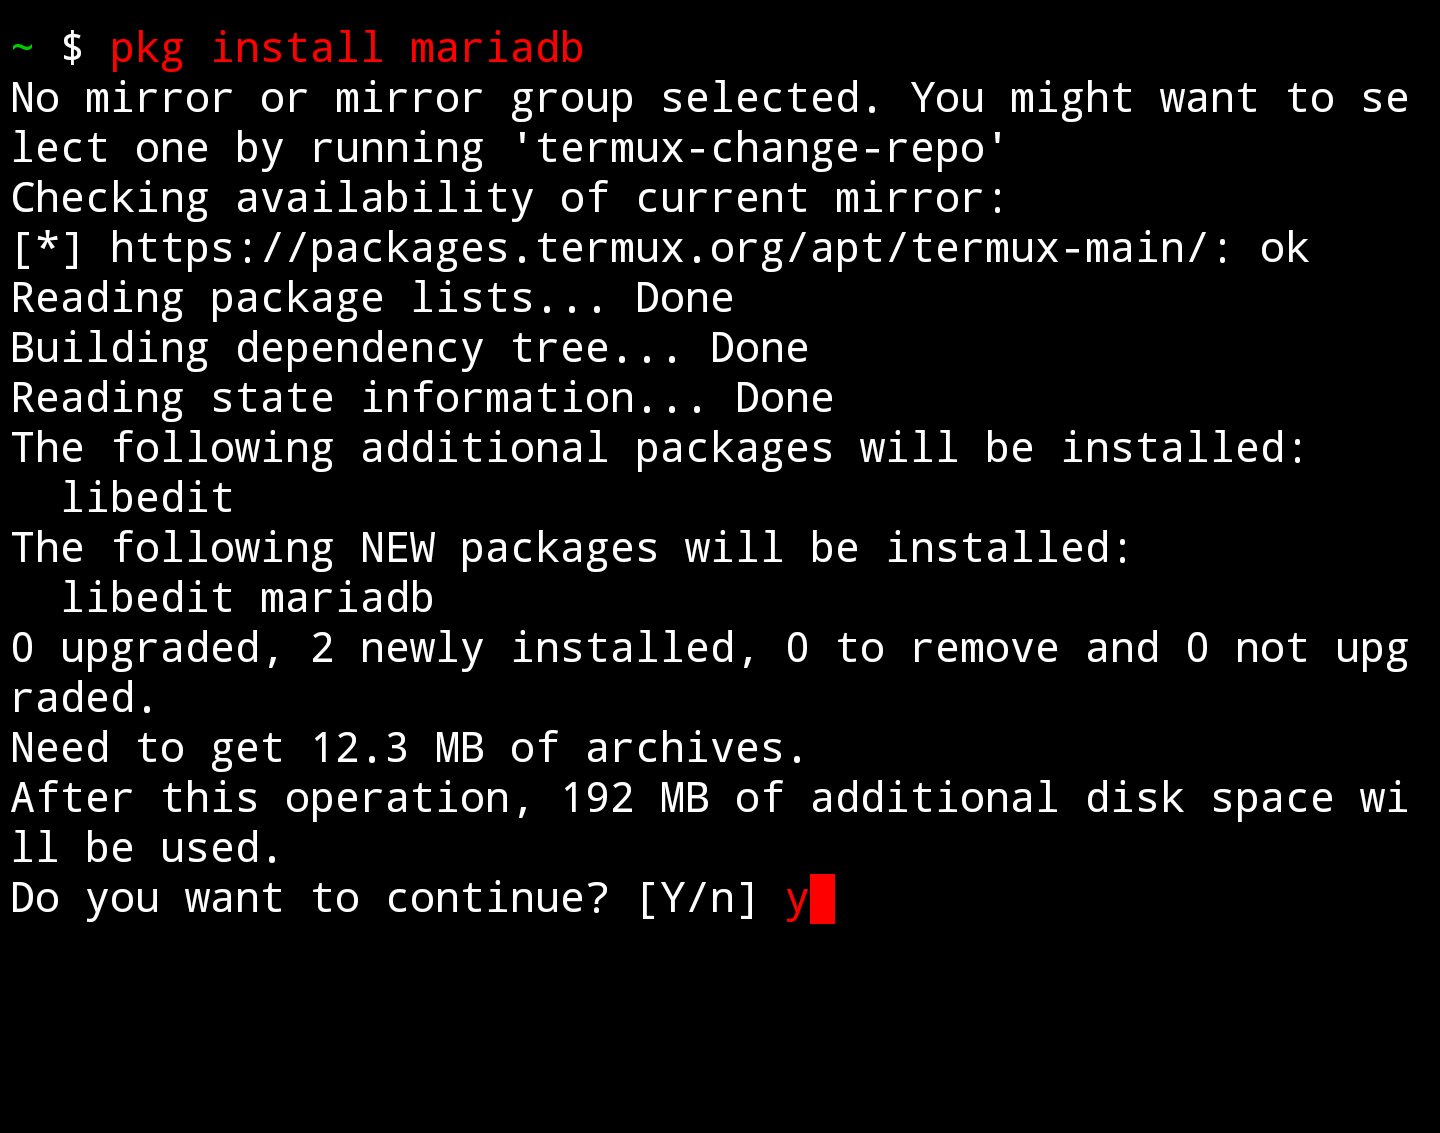
Installing MySQL(MariaDB)
OK, once you have your system updated we will install the MariaDB package. To do this, execute:
pkg install mariadb
If it asks you, accept everything by writing the letter y. It may take a while, it depends on your device, so be patient.
Testing MySQL on Android with Termux.
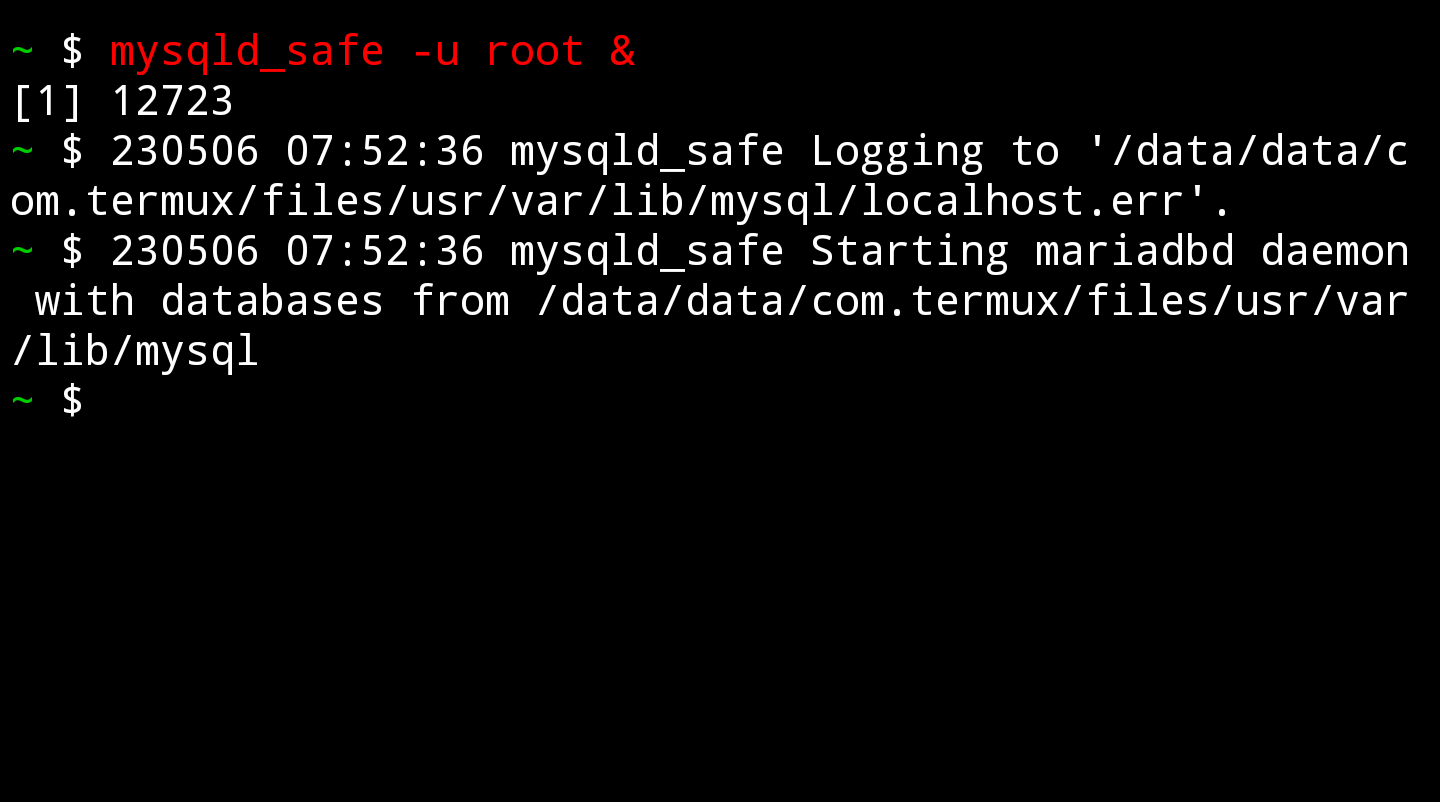
Starting the MySQL deamon
After that, what we have to do is start the MySQL daemon (this should also be done if we restart the phone. do the optional step to make the daemon start automatically). To do this, execute:
mysqld_safe -u root &
What we do is run mysqld_safe with the root user; the ampersand “&” is to run it in the background like starting xampp or wimp server on your windows PC. Run it and press Enter. This is how it looks in my case:
Optional : Making the daemon start automatically when log-ining
special thanks to damindu dhanajitha ❤
Run the following command once and every time you start termux, MySQL daemon will be started automatically.
echo "mysqld_safe -u root &" >> .profile
What we do here is using the linux default command ‘echo’ to add a new line in .profile file, everything in the .profile file will be executed automatically at the login.
Testing MySQL (Mariadb) on Android with Termux
Now that we’ve started the MySQL daemon its time to connect it from the client, execute:
mysql -u root
Just as you would do on the command prompt of windows. This must have shown you something like this, (If not, make sure you started the demon.)

Congratulations now you’ve got MySQL up and running on your smartphone. Its not a emulation of mysql like in most mobile apps, you’re hosting a server on your own, Pretty Awesome right?
Wrapping up
I’m gath high school student from Sri Lanka! Feel free to contact me if you got stuck or just wanna have a chat! Super Honest feedback is appreciated 😉
email : gnipulma@gmail.com
Also check out some games we’ve made in the past: https://gatheesha.itch.io/